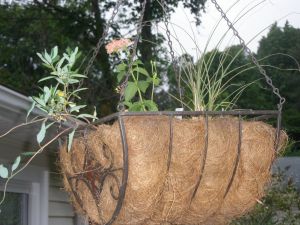
You know when you go to Lowes or Logans…or any other nursery and there are these beautiful hanging baskets that are outrageously priced. Well, I found out an easy and inexpensive way to have glorious hanging baskets every year under $10.
It is all about the formula.
- You need a hanging basket. I found some really cool ones at Tuesday Morning between $5-$10. The best part about these is that you can use them year after year. They are really interesting metal ones..a little heavy but very posh looking. If you have any passion around keeping it “green” and reusing things year after year–this is the ticket! Not to mention the savings year after year.
- Now pick your flowers–1,2,3. Most of these plants cost a dollar or less.
- First find an upright annual. The cool part is that usually these plants are labeled accordingly, so you get to just pick out what you like and the colors you fancy. Total no brainer. I like to choose a variety. In one of my baskets I have some decorative tall grasses, in another I have a couple of Zinnas, and in another, I picked this random one out. Never seen it before, so it will be a welcomed surprise.
- Next choose a mounding annual. I feel like these are the most common when you are looking down the isles. I have a begonia in one, some lantana in another verbina in another and a geranium in another. Lots of choices here. Go ahead…mix it up a little.
- Finally choose a trailing annual. These are really fun to me. You can choose sweet potato vines, blue haze, wave petunias, and much, much more. These trailing plants in the middle of summer make my deck look like the Gardens of Babylon.
The last step is assembly. You take the hanging basket, add soil/compost mixture. Then you put the upright annual in the back, then the mounding annuals in the middle and the trailing annuals in the front. Water. Voila. Unique, fun and way less expensive hanging baskets for you to enjoy all summer.
What are you favorite hanging basket combos?
Happy Gardening.
m


1 comment
Comments feed for this article
May 17, 2010 at 6:26 pm
christineramsey
Great advice, Melissa. I always do some hanging pots for my shade bed. I don’t put in a tall plant, but pink impatients are my mounding plant and creeping jenny, a yellow foliage plant, is my trailing plant. The whole pot comes together for about 2 bucks, plus the cost of potting mix and plant food. I use Osomocote, a timed release fertilizer that feeds for four months.
Also hanging pots need lots of water. Don’t forget to check them for drying out. Other than that–effortless and a great way to go vertical in the garden. Keep up the good work. And keep us posted on your pots.